Gatling
Gatling is a highly capable load testing tool. It is designed for ease of use, maintainability and high performance.
Out of the box, Gatling comes with excellent support of the HTTP protocol that makes it a tool of choice for load testing any HTTP server. As the core engine is actually protocol agnostic, it is perfectly possible to implement support for other protocols. For example, Gatling currently also ships JMS support.
The Quickstart has an overview of the most important concepts, walking you through the setup of a simple scenario for load testing an HTTP server.
Having scenarios that are defined in code and are resource efficient are the two requirements that motivated us to create Gatling. Based on an expressive DSL, the scenarios are self explanatory. They are easy to maintain and can be kept in a version control system.
Gatling’s architecture is asynchronous as long as the underlying protocol, such as HTTP, can be implemented in a non blocking way. This kind of architecture lets us implement virtual users as messages instead of dedicated threads, making them very resource cheap. Thus, running thousands of concurrent virtual users is not an issue.
Gatling User guide
- What’s New
- Migration Guides
- Installation
- Quickstart
- Advanced Tutorial
- General
- Session
- HTTP
- JMS
- MQTT
- Realtime monitoring
- Extensions
- Cookbook
How to Install Gatling on Windows
Follow the below mentioned steps for smooth installation on Gatling on Windows
1. Install JDK8 – 64 bit from Java SE Downloads on Oracle.
2. Install the JDK8 on windows.
3. Set-up JAVA Home by adding it to Environmental variables
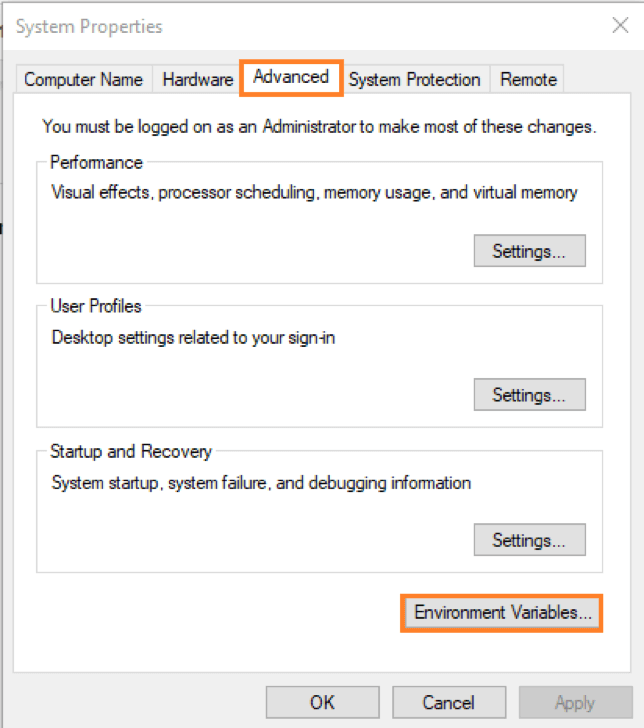
4. This step we will set the environment variable for java. Right-click on “My Computer” and select “Properties.” Click the “Advanced system settings” button like the screenshot below:

5. Under the ‘Advanced’ tab, choose the “Environment Variables…” button.

6. If we want the environment variable for java to be used only by the current windows user, go to the User Variables for <user> section. If we want the environment variable for java to be used by all windows users, go to the System variables section. In this example we will choose the System variables and click on the “New…” button, as shown below:
7. Type in “Variable name” and “Variable value” with the variable name as the name of the environment variable for java and the variable value as the path directory of jdk8.
- Variable name: JAVA_HOME
- Variable value: C:\Program Files\Java\jdk1.8.0_171
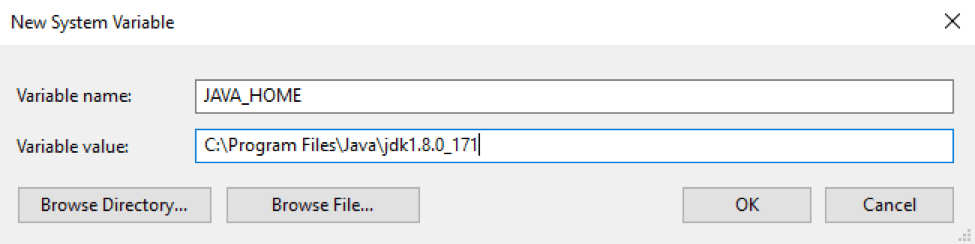
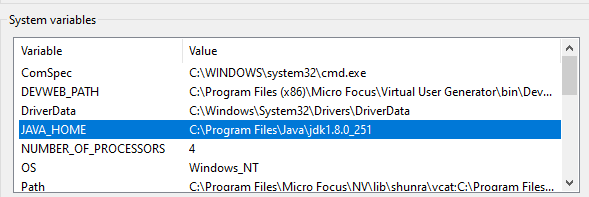
Then we have:
8. Click on the “Path” variable as shown below.
9. Add a new line and type in %JAVA_HOME%\bin.

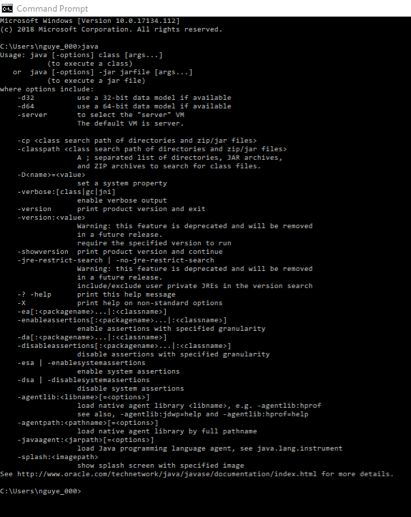
10. To verify the success of the installation, go to the command prompt and type ‘java’ as a command. The output of the command should look like below. If the Java installation is unsuccessful or if it had NOT been installed, it will throw an “unknown command” error.
11. Go to the download section on the Gatling website and click on the button “DOWNLOAD NOW!”. Note that the latest release is now Gatling 3.3.1.
There is no specific installer or exe file for Gatling. Only the bundles that need to be downloaded and unzipped.
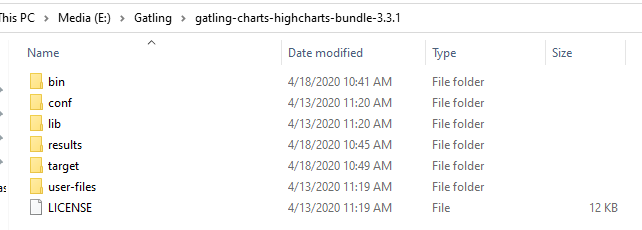
12. After completing the download, unzip the zip file ( gatling-charts-highcharts-bundle-3.3.1-bundle.zip) and copy all items to another folder. In this example I copied all items to a folder named gatling-charts-highcharts-bundle-3.3.1 in the E drive.
13. This step we will set the environment variable for Gatling. Right-click on “My Computer” and select “Properties.” Click the “Advanced system settings” button.

14. Under the ‘Advanced’ tab, choose the “Environment Variables…” button.
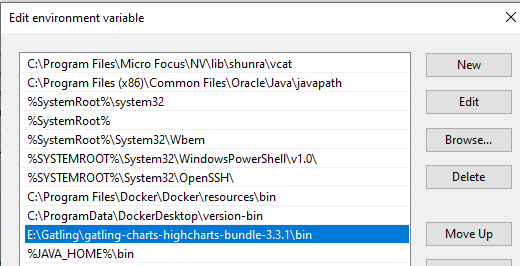
15. Click on the “Path” variable as shown below.
16. Add a new line and type in E:\Gatling\gatling-charts-highcharts-bundle-3.3.1\bin.
Congratulations! You now have Gatling installed! You can now start out with your first Gatling load test. You can start by recording scenarios, customizing the scripts to meet your purposes and executing them.
Here is a quick explanation:
1. Go to the bin folder (in this example E:\gatling\gatling-charts-highcharts-bundle-3.3.1\bin).
2. Double click on the “recorder.bat” file.
3. A command prompt window will be displayed.

4. A recorder window will be automatically displayed. This is the default:
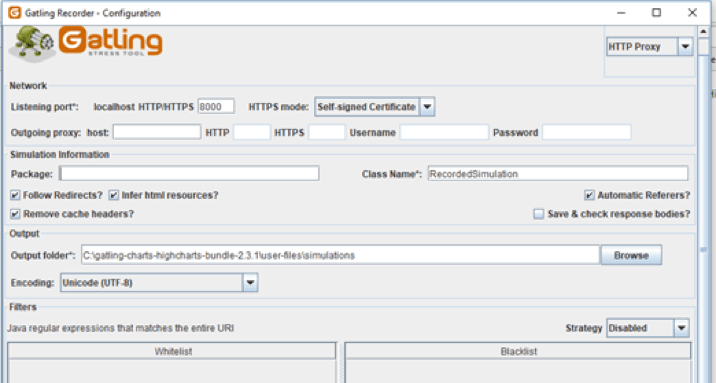
From here on you can customize and record scenarios.
1. Go to the bin folder (in this example E:\gatling\gatling-charts-highcharts-bundle-3.3.1\bin)
2. Double click on the “gatling.bat” file. This is the Gatling execution file, which runs the test.
3. A command prompt window is displayed and then load testing information will be displayed on the command prompt window, such as: the GATLING_HOME variable, the Java execution file, Scripts, etc.
4. The Command prompt window will look like this:
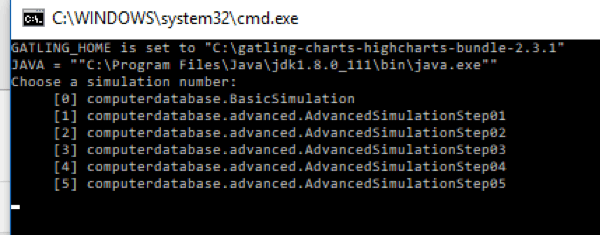
5. Choose the script file you want to execute from there.
After creating your Gatling script in Scala, you can upload it to BlazeMeter and easily run your test in a SaaS product. Enjoy an easy to use GUI, advanced reporting and collaboration capabilities.